Magicflow Plumbing

Residential Plumbing

Magic Flow Plumbing 3

Tankless Water Heater Spring Maintenance: What Most Homeowners Ignore

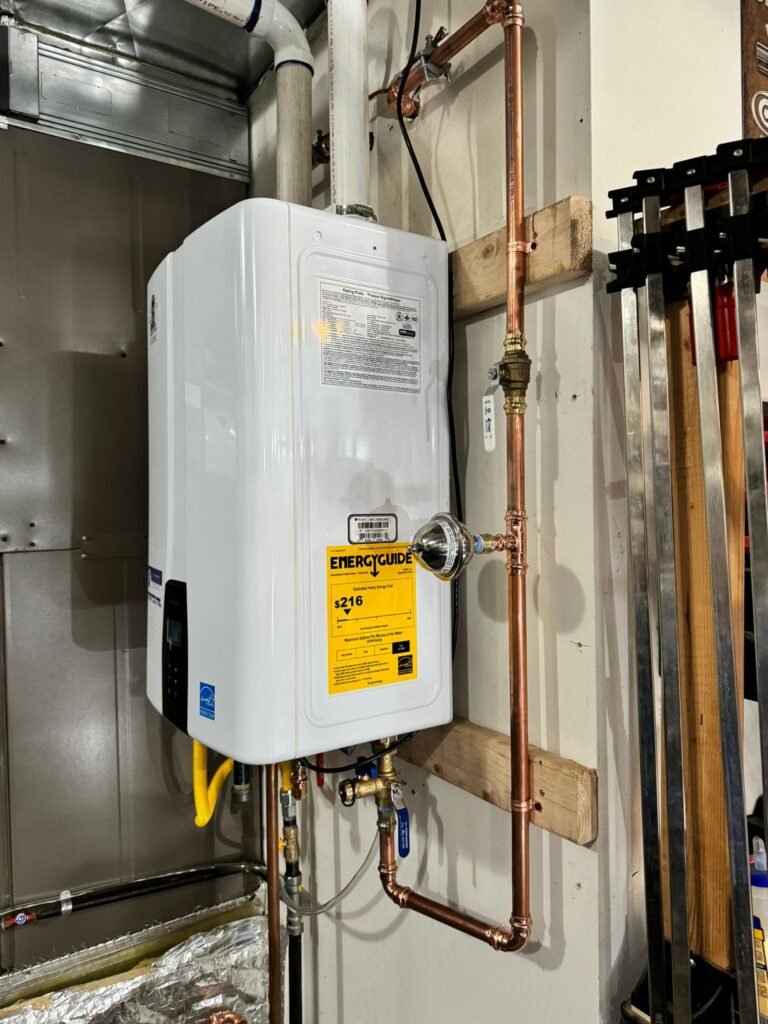
Tankless Water Heater Spring Maintenance: What Most Homeowners Ignore By Magic Flow Plumbing | Serving Lake Stevens, Bellevue, Kirkland & the Greater Seattle, WA Area 📞 425-666-8363 Tankless water heaters are one of the best upgrades a homeowner can make. They heat water on demand, last longer than traditional tank units, and deliver energy savings that show up on your utility bill month after month. They’re reliable, efficient, and for the most part, quiet. And that quietness is exactly the problem. Because tankless water heaters rarely announce when something is wrong, most homeowners simply forget they need maintenance at all. Out of sight, mounted on a wall in the garage or utility room, they just keep working. Until they don’t. Spring is the most important maintenance window for tankless units across the Greater Seattle, WA area, including Lake Stevens, Bellevue, and Kirkland. Your unit just finished the hardest months of the year. Colder incoming water temperatures through winter force the heater to work harder and longer to reach your set temperature, which accelerates mineral buildup, stresses heating components, and shortens the service life of a unit that should otherwise last 20 years or more. The homeowners who get two decades of reliable service from their tankless water heater are the ones who maintain it consistently. The ones who don’t are the ones calling us in July with no hot water and a repair bill that dwarfs what annual maintenance would have cost. At Magic Flow Plumbing, we maintain tankless water heaters for homeowners throughout the Greater Seattle area every spring. Here is exactly what that maintenance involves, what most homeowners skip, and why each item matters. Step 1: Descaling and Flushing the Heat Exchanger This is the most critical maintenance task for any tankless water heater, and it’s the one most homeowners have never done. The water supply throughout King County and Snohomish County carries dissolved minerals, primarily calcium and magnesium. As water moves through your tankless unit’s heat exchanger, those minerals don’t stay dissolved. The heat causes them to precipitate out of the water and deposit on the interior surfaces of the exchanger. Over time, this buildup, called scale or limescale, forms an insulating layer between the heating element and the water passing through it. The consequence is significant. Your water heater has to work harder and run longer to heat the same volume of water through a scaled exchanger. Energy consumption goes up. The heating element cycles more frequently and runs hotter to compensate, which accelerates wear. In severe cases, scale buildup restricts flow through the heat exchanger entirely, triggering error codes and shutdowns. A descaling flush uses a food-grade white vinegar solution or a commercial descaler circulated through the heat exchanger with a small pump. The process takes about 45 minutes to an hour and removes accumulated mineral deposits from the previous year. For homes in the Lake Stevens and greater Seattle area with moderately hard water, annual flushing is the standard recommendation. Homes with particularly hard water may benefit from flushing every six months. If your unit has never been flushed and has been running for more than two years, this is not optional maintenance. It is a necessary repair. Call Magic Flow Plumbing at 425-666-8363 to schedule a descaling service before the buildup causes permanent damage to the heat exchanger. Step 2: Clean the Inlet Filter Screen Every tankless water heater has a small screen filter on the cold water inlet line. Its job is to catch sediment and debris before they enter the unit. Most homeowners have never looked at it. Many don’t know it exists. Over a winter of heavy use, this screen collects fine sediment, mineral particles, and any debris that made it through from the supply line. A clogged inlet screen reduces the flow of water into the unit. Reduced flow can cause the unit to misread demand, heat water inconsistently, or fail to fire at all on low-flow draws, such as a single bathroom faucet running at partial flow. Cleaning the inlet screen takes about five minutes once the water supply is shut off. The screen is typically located directly on the cold water connection at the base or side of the unit. Remove it, rinse it clean, reinstall it. That’s the entire task. It’s a simple step that’s easy to overlook and easy to do, and it directly affects the consistency of your hot water delivery, particularly at lower flow rates. Step 3: Inspect the Venting System Gas-powered tankless water heaters require proper venting to exhaust combustion gases safely out of your home. The vent system consists of PVC or stainless steel pipes that run from the unit through an exterior wall or up through the roof. Over a Pacific Northwest winter, venting systems accumulate several specific issues. Nesting material is one of the more common ones. Birds and rodents are drawn to the warmth of exhaust vents in cold months, and by spring it’s not unusual to find partial blockages of nesting debris in outdoor vent terminations. Insects can also build nests in exterior vent caps during warmer stretches of winter weather. Beyond blockages, inspect the vent pipe joints and connections for any separation or gaps. Vibration over months of use can loosen connections, particularly in long horizontal vent runs. Even a small gap in a vent joint inside the home is a carbon monoxide risk that should be treated as an emergency. For electric tankless units, the venting concern doesn’t apply, but the importance of inspecting electrical connections, particularly the high-amperage wiring that powers resistance heating elements, is equally important. If you are not comfortable inspecting your own venting system, this is a reasonable task to include in a professional spring maintenance visit. Proper venting is not a component to guess on. Step 4: Test the Pressure Relief Valve The temperature and pressure relief valve, commonly called the T&P valve, is a critical safety component on every water heating system, tankless or traditional. Its function is

Tankless Water Heater Spring Maintenance: What Most Homeowners Ignore Read More »
magic flow plumbing drains

Is Your Drain Ready for Spring? Signs You Need Professional Drain Cleaning

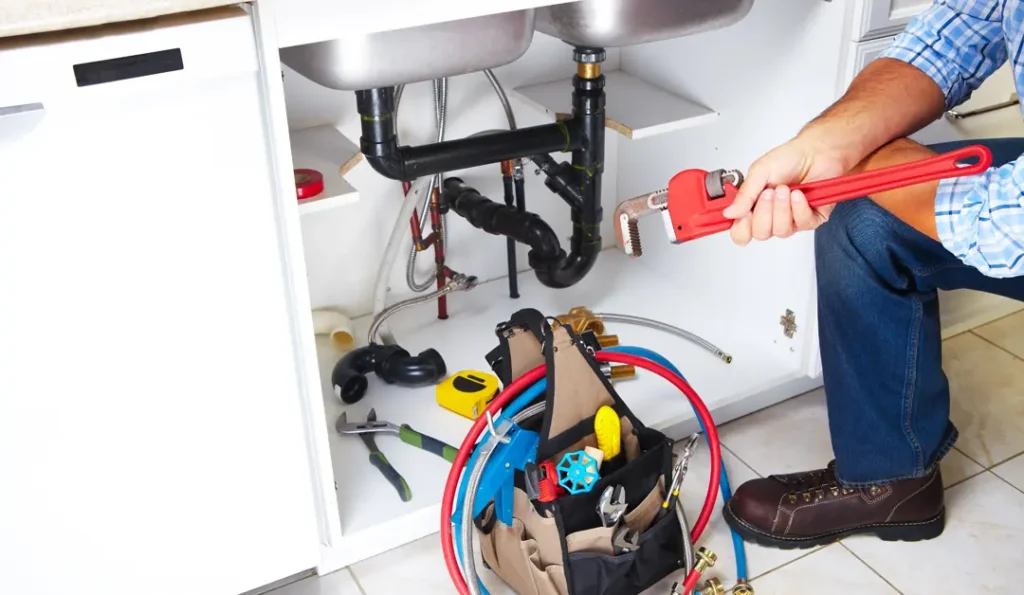
Is Your Drain Ready for Spring? Signs You Need Professional Drain Cleaning By Magic Flow Plumbing | Serving Lake Stevens, Bellevue, Kirkland & the Greater Seattle, WA Area 📞 425-666-8363 Most homeowners don’t think about their drains until something goes wrong. And that’s understandable — a drain that’s working is invisible. It does its job quietly, out of sight, and asks for nothing in return. Until one morning in April when the kitchen sink is holding water for thirty seconds longer than it used to, or the shower has a thin puddle collecting around your feet that wasn’t there last fall. That’s the moment most people reach for a bottle of chemical drain cleaner, pour it in, and call it solved. Except it’s not solved. It’s masked. And what’s waiting on the other side of that chemical band-aid is months of accumulated buildup that has been quietly narrowing your drain lines all winter — grease, soap scum, hair, mineral deposits, and in some cases the early stages of root intrusion working its way into your underground lines. In the Greater Seattle, WA area — including Lake Stevens, Bellevue, and Kirkland — winter is hard on drains for reasons that go beyond just heavy use. Colder water temperatures slow the movement of fats and grease through drain lines, causing them to solidify closer to the drain opening. Increased indoor time through the wet months means more cooking, more showers, more sink use, and more material moving through your plumbing than at any other time of year. By the time spring arrives, your drains have been doing the hardest work of the year — and it shows. Here’s how to read the signs, understand what they mean, and know when a professional drain cleaning is the right call. Symptom #1: Slow Drains — One or Several A slow drain is the most common and most ignored symptom of a drain system under stress. It’s easy to rationalize: the sink drains eventually, the shower clears before you step out, it’s probably just a little buildup. But here’s what that slowness is actually telling you. Water should move through a properly clear drain line quickly and consistently. When it hesitates, pools, or takes noticeably longer than it once did, the diameter of your drain pipe has been effectively reduced by buildup coating the interior walls. That buildup doesn’t go away on its own. It accumulates. The drain that takes five extra seconds to clear in March takes thirty extra seconds by June and fully backs up in August — at the worst possible time. The important distinction: A single slow drain points to a localized clog — usually in the P-trap or the first few feet of pipe below the fixture. Multiple slow drains throughout your home simultaneously point to a problem further down the line, closer to — or in — your main sewer line. That’s a fundamentally different problem requiring a different solution. One slow drain: likely a DIY-manageable clog or a professional cleaning of that line. Multiple slow drains: call Magic Flow Plumbing at 425-666-8363 — this needs professional assessment. Symptom #2: Gurgling Sounds From Drains or Toilets Your plumbing shouldn’t make much noise. Water flows, pipes hum faintly — that’s normal. What’s not normal is a gurgling or bubbling sound from a drain or toilet that occurs when a nearby fixture is being used. Flush the toilet and the tub drain gurgles. Run the kitchen sink and the floor drain in the laundry room makes noise. What you’re hearing is air. Specifically, air being displaced by water trying to move through a partially blocked line. The blockage forces water to find the path of least resistance, and as it does, it pulls air through nearby drain openings — creating that distinctive gurgle. In Washington homes, this symptom in spring often indicates one of two things: significant grease and debris buildup in a shared drain line that serves multiple fixtures, or early-stage root intrusion in the main sewer line. Both require professional attention. Neither gets better on its own. The gurgling is your plumbing system communicating clearly. Don’t ignore it. By the time gurgling escalates to the next stage — sewage odors or backups — the problem is considerably more expensive to address. Symptom #3: Unpleasant Odors From Drains A properly functioning drain doesn’t smell. The P-trap — the curved section of pipe beneath every sink and shower drain — holds a small amount of standing water that acts as a seal, blocking sewer gases from rising back up through the drain opening into your living space. When you notice a rotten egg smell, a sewage odor, or a persistent musty smell coming from a drain, one of several things is happening. The P-trap may have dried out from a fixture that hasn’t been used for a while — common in guest bathrooms over winter. More concerning is when the odor persists from regularly used drains, which can indicate biofilm buildup inside the drain line itself — layers of bacteria, decomposing organic matter, grease, and hair that have accumulated over months and are now actively off-gassing into your home. Across Lake Stevens, Bellevue, and Kirkland, we find this symptom particularly common in kitchen sink drains and bathroom drains after the winter months. The combination of reduced airflow through closed-up homes in winter and increased cooking and bathing frequency creates ideal conditions for biofilm development. The consequence of ignoring it: Beyond the obvious unpleasantness, biofilm-clogged drains create backflow risk and can harbor bacteria that affect indoor air quality. A professional drain cleaning removes the source of the odor entirely — not just temporarily — by physically clearing the buildup rather than masking it with chemicals. Symptom #4: Recurring Clogs in the Same Drain If you’ve cleared a drain once this winter — used a plunger, snaked it yourself, or poured a chemical cleaner down it — and it’s slow or blocked again within a few weeks, that’s not bad luck. That’s

Is Your Drain Ready for Spring? Signs You Need Professional Drain Cleaning Read More »

magic flow plumbing problems

Top 5 Plumbing Problems That Show Up in Spring in Washington Homes

Top 5 Plumbing Problems That Show Up in Spring in Washington Homes By Magic Flow Plumbing | Serving Lake Stevens, Bellevue, Kirkland & the Greater Seattle, WA Area 📞 425-666-8363 Washington State homeowners deal with a plumbing reality that’s genuinely different from most of the country. We don’t face the brutal deep-freeze winters of Minnesota or the drought-cracked soil of Arizona. What we get instead is something more subtle: months of relentless moisture, saturated ground, rapidly fluctuating temperatures in late winter and early spring, and a Pacific Northwest ecosystem that grows vigorously and relentlessly — including right into your pipes. The result is a specific, predictable set of plumbing problems that surface every spring across Lake Stevens, Bellevue, Kirkland, and communities throughout the Greater Seattle, WA area. At Magic Flow Plumbing, we see the same five issues climb steadily from March through May, year after year. Some are dramatic. Some are sneaky. All of them are significantly more manageable — and less expensive — when you know what to look for. Here are the top five plumbing problems Washington homeowners face in spring, why they happen here specifically, and what to do when they show up at your door. Problem #1: Tree Root Intrusion in Sewer Lines This is the one that surprises homeowners the most, and it’s the one we’re called out for most consistently in the spring across the greater Seattle area. Washington’s wet winters create ideal conditions for root growth. The same moisture that keeps the Pacific Northwest green drives tree and shrub root systems to spread aggressively through soil in search of water and nutrients. Your underground sewer line — which carries warm, moisture-rich wastewater — is essentially a beacon for opportunistic roots. Even a hairline crack in an older clay or concrete pipe is enough of an entry point for a root tendril to work its way inside. Over a wet winter, roots that found a small crack in October have had four to five months to grow. By spring, what started as a hairline intrusion can be a partial or full blockage. You’ll notice it as slow drains throughout the house, gurgling sounds from toilets when other fixtures drain, or in severe cases, sewage backing up into tubs and floor drains. Homes in older neighborhoods of Lake Stevens, parts of Kirkland, and established areas of Bellevue with mature tree canopies are especially vulnerable, as older pipe materials are far more susceptible to cracking than modern PVC. What to do: Slow drains throughout the house — not just one fixture — are the key signal. A single slow drain is usually a local clog. System-wide slow drainage points to the main sewer line. Call Magic Flow Plumbing at 425-666-8363 for a sewer line inspection. Camera inspections can confirm root intrusion without any digging, and catching it before a full blockage means clearing the line rather than replacing it. Problem #2: Sump Pump Failure After a Hard Winter If your home has a sump pump — and many homes in low-lying areas of Snohomish County, King County, and around Lake Stevens do — spring is both the most important time for it to work and the most likely time it won’t. Here’s the cycle we see repeatedly: a sump pump runs heavily through the wet fall months, gets a hard workout during winter storms, then sits in near-continuous use. By spring, when rainfall picks up again and snowmelt from higher elevations begins moving through the watershed, a pump that’s been working at capacity for five months is exactly the one most likely to fail. Burned-out motors, stuck float switches, and clogged discharge lines are all common after a demanding winter season. The Pacific Northwest’s spring rainfall pattern makes this especially dangerous. Unlike regions where spring brings dry relief, the Greater Seattle, WA area routinely sees its second-wettest period of the year in March and April. A sump pump that fails in a King County basement on a wet April night can flood a finished space with thousands of gallons before anyone notices. What to do: Test your sump pump now, before you need it urgently. Pour a bucket of water into the pit and confirm the pump activates, runs, and drains the pit completely. Listen for grinding or rattling, which signals mechanical wear. Check that the discharge line exits well away from your foundation and isn’t blocked by winter debris. If the pump is more than seven years old or shows any hesitation, the cost of a replacement is trivial compared to the cost of a flooded basement. Call us at 425-666-8363 and we can assess, repair, or replace your sump pump quickly. Problem #3: Freeze-Damaged Outdoor and Crawl Space Pipes The Greater Seattle area doesn’t freeze as hard or as long as eastern Washington, but it freezes enough — and the way it freezes is particularly damaging to residential plumbing. We get cold snaps that drop overnight temperatures to the mid-20s, followed by above-freezing days, followed by another freeze. That thaw-refreeze cycle is actually more damaging to pipes than a single sustained freeze, because it stresses the pipe material repeatedly and can cause cracks to widen with each cycle. Crawl space pipes are the most common casualty in our service area. Homes in Lake Stevens, Kirkland, and parts of Bellevue with older construction often have limited or inconsistent crawl space insulation, leaving supply pipes exposed to outdoor temperatures. Exterior wall pipes — particularly those feeding outdoor faucets, laundry rooms on exterior walls, or garage utility sinks — are similarly vulnerable. The sneaky nature of this damage is that many cracked pipes don’t fail immediately. They hold pressure through the last cold weeks of winter, then begin weeping slowly as spring temperatures stabilize and water demand increases. The first signs are often a mysteriously higher water bill, damp insulation in the crawl space, or soft spots on flooring above the crawl space. What to do: Have your crawl space inspected visually in early spring. Look

Top 5 Plumbing Problems That Show Up in Spring in Washington Homes Read More »

magic flow plumbing spring outdoor

Outdoor Faucet & Hose Bib Inspection Guide for Spring

Outdoor Faucet & Hose Bib Inspection Guide for Spring By Magic Flow Plumbing | Serving Lake Stevens, Bellevue, Kirkland & the Greater Seattle, WA Area 📞 425-666-8363 It’s one of the first things you do when spring arrives — you walk outside, twist the hose bib open, connect the garden hose, and get back to yard work. Simple. Routine. Forgettable. Except this year, there’s a drip that wasn’t there before. Or the water pressure feels off. Or you notice a damp patch on the interior wall right behind that outdoor faucet, and suddenly what should have been a five-second task turns into a question you’d rather not answer: did something freeze and crack over winter? In the Greater Seattle, WA area — including Lake Stevens, Bellevue, and Kirkland — we don’t get the brutal extended freezes that hit the Midwest, but we do get enough below-freezing nights to quietly damage outdoor plumbing. The tricky part is that freeze damage rarely announces itself loudly. A pipe that cracked slightly in January might drip for months before it fails completely — and by then, you might be dealing with water damage inside your wall, not just a worn-out faucet outside. At Magic Flow Plumbing, we handle a steady stream of outdoor faucet repairs every spring, and almost every one of them could have been a smaller, cheaper fix if the homeowner had caught it earlier. That’s why we put together this step-by-step guide — so you know exactly what to look for, how to test your system, and when a simple DIY fix is enough versus when it’s time to call in a professional. What Is a Hose Bib, and Why Does It Freeze? A hose bib (also called a spigot or outdoor faucet) is the threaded valve on the outside of your home where you attach a garden hose. Most homes have at least one; many have two or three placed around the exterior. The reason outdoor faucets are so vulnerable to freeze damage is simple: they’re exposed. Unlike the pipes running through your insulated walls and heated interior spaces, the portion of pipe that connects to your outdoor faucet is directly up against — or outside — your exterior wall. When temperatures drop below 32°F overnight, that water can freeze, expand, and either crack the pipe itself or damage the internal valve mechanism. Newer homes in the Lake Stevens and Bellevue areas are often equipped with frost-free hose bibs — a style designed with a longer stem that shuts off water several inches inside the wall rather than at the exterior face. These are more freeze-resistant, but not freeze-proof. If a hose was left connected to a frost-free bib during a freeze, or if the bib is installed at the wrong angle, they can still sustain damage. Step-by-Step: How to Inspect Your Outdoor Faucets This Spring Work through this inspection on every outdoor faucet on your property. It takes about five minutes per faucet and requires nothing more than your eyes, your hands, and a piece of dry paper towel. Step 1: Visual Exterior Inspection Before you turn anything on, look at the faucet itself. Get close. You’re looking for: Any cracking in the faucet body is a red flag regardless of what the faucet does when you turn it on. Even a hairline crack will worsen under water pressure. Step 2: Check the Interior Side First Go inside and find the wall directly behind the outdoor faucet. This is usually a utility room, garage wall, or kitchen cabinet. Look for: This interior check is critical because it’s where freeze damage often hides. A cracked pipe inside the wall can drip slowly for months, hidden entirely from the exterior. If the interior looks clean and dry, good — continue to Step 3. Step 3: Turn the Water On Slowly Open the faucet slowly and let it run for 30 seconds. Watch the faucet face and the point where the pipe exits the wall simultaneously. Look for: Normal flow should be steady and originate entirely from the spout. Any water appearing from somewhere other than the tip of the spout indicates a breach somewhere in the valve or pipe. Step 4: The Paper Towel Test With the faucet running, dry the faucet body and the pipe collar with a paper towel, then hold the dry towel against each section — the handle, the collar, the pipe connection — for 10 seconds. Any dampness appearing on the towel indicates a leak that may be too slow to see with the naked eye but is absolutely losing water. Step 5: Shut Off and Observe Turn the faucet off completely. Wait 60 seconds, then check the spout. A faucet in good working order should stop dripping within a few seconds of being closed. If it continues to drip — even slowly — the internal washer or valve seat is worn and the faucet is leaking even when “off.” A dripping faucet left unaddressed from spring through summer can waste 1,000–3,000 gallons of water. That’s money dripping onto your foundation all season long. Warning Signs That Mean Call a Plumber — Don’t Wait Some findings from the inspection above are easy DIY repairs: a new washer, a tightened packing nut, a drip that stops with a wrench. But certain warning signs mean the problem is beyond the faucet itself and requires a licensed plumber. Call Magic Flow Plumbing at 425-666-8363 if you notice any of the following: DIY Repairs You Can Handle Yourself Not every issue needs a service call. Here’s what most handy homeowners can tackle on their own: Replacing a worn washer: If the faucet drips after being closed, the rubber washer at the tip of the valve stem has worn out. Shut off the water supply to that faucet from inside, remove the handle and packing nut, pull the stem, and swap the washer. Hardware stores in the Lake Stevens and Kirkland areas carry universal faucet washer kits for a few

Outdoor Faucet & Hose Bib Inspection Guide for Spring Read More »

magic flow plumbing spring bill

Why Your Water Bill Goes Up in Spring

Why Your Water Bill Goes Up in Spring (And How to Fix It Fast) By Magic Flow Plumbing | Serving Lake Stevens, Bellevue, Kirkland & the Greater Seattle, WA Area 📞 425-666-8363 You open your water bill in May and do a double-take. It’s noticeably higher than it was in January — and you haven’t done anything differently. No longer showers. No new appliances. No houseguests. So where is all that water going? You’re not imagining it, and you’re not alone. Every spring, homeowners across Lake Stevens, Bellevue, Kirkland, and the Greater Seattle, WA area call us at Magic Flow Plumbing asking the same question. The answer is almost always one of a handful of predictable culprits — and the good news is that most of them are fixable quickly, and some are fixable for free. The bad news? If you ignore a rising water bill, the problem doesn’t plateau. It compounds. A hidden leak that costs you an extra $30 a month in April can destroy a wall, rot a subfloor, or spike your bill by hundreds of dollars by August. This is a money problem that only gets more expensive the longer you wait. Here’s what’s most likely driving up your water bill this spring — and exactly what to do about it. The #1 Culprit: A Toilet That’s Secretly Running It sounds small. It doesn’t sound like much at all, actually — maybe a faint hiss you’ve tuned out. But a running toilet is the single most common cause of an unexplained spike in residential water bills, and it can waste anywhere from 100 to 200 gallons of water per day. Do the math: 150 gallons a day over 30 days is 4,500 gallons. At Greater Seattle area water rates, that can add $30–$60 to your monthly bill from a single toilet — and most homeowners have no idea it’s happening. The fix: Drop a few drops of food coloring into the toilet tank. Don’t flush. Wait 10 minutes. If color seeps into the bowl, your flapper valve is failing and water is silently draining through. A new flapper costs a few dollars at any hardware store and takes 10 minutes to replace — it’s one of the few plumbing fixes most homeowners can handle themselves. If the problem persists after replacing the flapper, or if you have multiple toilets showing this issue, it’s time to call a plumber. There may be a bigger problem with the fill valve or the tank seal. Outdoor Faucets and Hose Bibs: The Ones You Forgot About All Winter Here’s a scenario we see constantly in Lake Stevens and Kirkland every spring: a homeowner reconnects their garden hose to an outdoor spigot for the first time since October — and that spigot has a slow drip they never noticed before. Maybe it froze slightly over winter. Maybe the washer finally wore out. Either way, it’s now dripping 24 hours a day, seven days a week, straight into your lawn. A dripping outdoor faucet can waste 20 gallons or more per day. Multiply that by a few months of outdoor season and you’re looking at potentially thousands of gallons gone — and none of it watered your garden usefully. The fix: Walk every outdoor faucet on your property and turn each one on and off fully. Watch the spigot face and the connection point for any dripping after you close it. A dripping spigot usually just needs a new washer or packing — a quick, inexpensive repair. However, if the faucet is dripping from inside the wall, or if there’s no obvious external drip but your bill is still climbing, that freeze damage may be internal and invisible. Irrigation Systems: The Biggest Wildcard Across Bellevue, Kirkland, and the surrounding communities, many homes have in-ground irrigation systems that have been dormant all winter. When homeowners fire them up in spring, they often discover — via their water bill — that something went wrong during the off-season. Irrigation line breaks, stuck-open zone valves, and misaligned heads can collectively dump hundreds of gallons into your yard every time the system runs. Because it’s happening underground or during early morning hours when no one is watching, these leaks often go undetected for weeks. The fix: Before running your irrigation system for the first time this spring, do a manual walkthrough of every zone. Activate each zone individually from the controller and physically walk the area while it runs. Look for unusual wet patches between runs, pooling water, or heads that won’t retract. If a zone seems to be running longer than normal to achieve the same result, you likely have a pressure loss somewhere in the line. A professional leak detection service can pinpoint irrigation line breaks without tearing up your yard. If your water bill jumped right around the time you activated irrigation for the season, don’t wait — this one won’t fix itself. Under-Slab and Behind-Wall Leaks: The Invisible Drain Some of the most expensive water waste comes from leaks you absolutely cannot see. Under-slab leaks — pipes running beneath your home’s foundation — and behind-wall leaks can run continuously for months without a visible sign of water damage. The only symptom you notice is the bill. Warning signs beyond a high water bill include warm spots on your floor (a sign of a hot water line leak beneath the slab), the sound of running water when all fixtures are off, or unexplained damp or soft spots on lower-level flooring. The fix: There’s no DIY solution here. Under-slab and behind-wall leaks require professional leak detection equipment — acoustic sensors and pressure testing tools that can locate a leak without destructive exploratory work. The sooner you catch a slab leak, the less damage you’re dealing with. Left alone, they erode your foundation, breed mold, and turn a contained repair into a major renovation. If you’re in the Lake Stevens, Bellevue, or Kirkland area and suspect a hidden leak, call us at 425-666-8363. We offer

Why Your Water Bill Goes Up in Spring Read More »

magic flow plumbing spring

Spring Plumbing Checklist: 7 Things Every Homeowner Should Inspect After Winter

Spring Plumbing Checklist: 7 Things Every Homeowner Should Inspect After Winter By Magic Flow Plumbing | Serving Lake Stevens, Bellevue, Kirkland & the Greater Seattle, WA Area Winter in the Greater Seattle, WA region is no joke. Between freezing overnight temperatures, weeks of relentless rain, and the occasional hard freeze that catches homeowners off guard, your plumbing system takes a serious beating from November through March. The sneaky part? Most of the damage doesn’t announce itself right away. A small crack in a pipe, a worn-out water heater seal, or a silently clogged drain can sit quietly through the coldest months — and then burst into an expensive, stressful problem right when you’re trying to enjoy spring. At Magic Flow Plumbing, we’ve seen it happen time and time again across Lake Stevens, Bellevue, Kirkland, and throughout the greater Seattle area. That’s why every spring, we encourage every homeowner to walk through this simple 7-point inspection checklist. Some items you can handle yourself. Others are a clear signal to pick up the phone and call a licensed plumber before a small issue becomes a major repair. 1. Check All Exposed Pipes for Cracks or Bulging Start with the pipes you can actually see — under sinks, in the garage, in the crawl space, or along exterior walls. During a hard freeze, water expands inside pipes. Even if a pipe didn’t burst outright during winter, it may have developed a hairline crack or a slight bulge that’s one warm day away from failure. What to look for: Discoloration, moisture, white mineral deposits around joints, or any visible deformation in the pipe material. When to call a plumber: If you spot any cracking, unusual bowing, or wet spots near pipe connections — don’t wait. A stressed pipe can fail suddenly and flood your home within minutes. 2. Test Every Faucet and Outdoor Spigot Turn on each faucet in your home, including the ones you rarely use. Low pressure or a sputtering flow can indicate a partial blockage or a pipe that partially froze and narrowed internally. Pay special attention to outdoor hose bibs and spigots — these are the most exposed to freezing temps and the most commonly damaged. What to look for: Reduced water pressure, discolored water (especially on first use), water that takes unusually long to run clear, or dripping when the faucet is fully closed. When to call a plumber: Persistent low pressure throughout the house, or any outdoor spigot that drips even when shut off, suggests internal damage that needs professional assessment. 3. Inspect Your Water Heater Your water heater worked overtime all winter keeping up with hot water demand. Spring is the perfect time to give it a thorough look-over. Sediment buildup — accelerated by cold water flowing in during winter — reduces efficiency and can shorten the life of the unit significantly. What to look for: Rust-colored water, a popping or rumbling sound when the heater runs, water pooling near the base, or a unit that’s more than 10 years old struggling to keep up with demand. When to call a plumber: Any visible leaking, rust in your hot water, or a unit that’s not maintaining temperature consistently. Homeowners in the Lake Stevens and Kirkland areas with older units may be overdue for a flush or a full replacement. 4. Inspect Toilets for Hidden Leaks A running toilet can waste hundreds of gallons of water per day — and you might not even hear it. The classic “silent leak” happens when the flapper valve wears out and water seeps continuously from the tank to the bowl. What to look for: Drop a few drops of food coloring into the toilet tank. Wait 15 minutes without flushing. If color appears in the bowl, you have a leak. Also check for any wobbling at the base, which can indicate a failing wax ring seal. When to call a plumber: A wobbling toilet or water damage around the base of the toilet requires prompt attention — a failed wax ring can lead to subfloor damage and mold growth. 5. Check Under-Sink Cabinets and Around Appliances Open every cabinet under your kitchen and bathroom sinks. Look at the back walls and the bottom of the cabinet floor. Also pull out your dishwasher slightly and look at the supply and drain connections. Small, slow leaks under sinks often go unnoticed for months until the cabinet floor is rotted through. What to look for: Staining, soft spots in the cabinet floor, warped wood, or any musty odor that signals moisture accumulation. When to call a plumber: Any active dripping, soft flooring material, or signs of mold. In the Greater Seattle, WA climate, moisture gets trapped easily — early intervention prevents major structural damage. 6. Test Your Sump Pump (If You Have One) Homes in low-lying areas around Lake Stevens, Bellevue, and other parts of King and Snohomish County often have sump pumps to manage groundwater. After a wet winter, your sump pump has likely been working hard — and spring brings more rain, not less. What to look for: Pour a bucket of water slowly into the sump pit and watch whether the pump activates and drains the pit promptly. Listen for unusual grinding or rattling sounds while it runs. When to call a plumber: If the pump doesn’t activate, runs continuously, or makes grinding noises, it may need repair or replacement. A failed sump pump during a Pacific Northwest spring rain is a basement flood waiting to happen. 7. Examine Your Main Shutoff Valve This one is easy to overlook because you rarely touch it — but knowing your main water shutoff valve works properly is critical in any plumbing emergency. A valve that hasn’t been turned in years can seize or fail to fully close when you need it most. What to look for: Turn the valve off and back on. It should move smoothly. Check for any dripping or corrosion around the valve body itself. When to call a

Spring Plumbing Checklist: 7 Things Every Homeowner Should Inspect After Winter Read More »

magic flow plumbing winter plumbing

Winterizing Your Outdoor Plumbing: A Step-by-Step Guide

As the temperature drops and the rainy season hits the Greater Seattle area, most homeowners start thinking about cozying up indoors. But before winter fully arrives, there’s an important job to handle outside — winterizing your outdoor plumbing. If you skip this step, your exterior pipes, faucets, and irrigation systems could freeze, burst, and cause costly water damage — not just outside but even inside your walls. At Magic Flow Plumbing, we’re licensed and bonded experts who have seen how one overlooked outdoor faucet can turn into a flooded basement. This guide walks you through exactly how to winterize your outdoor plumbing — step by step — to protect your home from cold-weather surprises. Why Winterizing Outdoor Plumbing Matters Outdoor plumbing faces harsher conditions than anything inside your home. When temperatures drop below freezing, any water left in exterior pipes, garden hoses, or irrigation systems can turn to ice. And since water expands when it freezes, that ice puts enormous pressure on pipes — often enough to crack or burst them. When the ice melts, water gushes out, sometimes flowing back into your home through the walls or foundation. A few real-world examples of damage we see every winter: Most of these problems are completely preventable with just an hour or two of preparation. Step 1: Turn Off the Water Supply to Outdoor Faucets Find the shut-off valves Most homes in the Greater Seattle area have shut-off valves inside the house that control water to the outdoor faucets (also called hose bibs). They’re usually located: What to do If your home doesn’t have a dedicated shut-off valve, you may want to have Magic Flow Plumbing install one. It’s a quick, inexpensive job that can save you thousands in future water damage. Step 2: Disconnect and Drain All Garden Hoses It’s easy to forget, but leaving a garden hose connected is one of the most common causes of frozen plumbing in winter. Here’s why: When a hose remains attached, water can’t fully drain from the faucet or pipe. That trapped water freezes and expands, cracking the hose bib or the pipe behind the wall. What to do If you use automatic hose reels, check for any remaining water in the line and drain that too. Step 3: Insulate Outdoor Faucets (Hose Bibs) Even after shutting off the water and draining the lines, outdoor faucets can still freeze if exposed to the elements. How to protect them In older Seattle homes with exposed plumbing on exterior walls, extra insulation makes a big difference — especially when temperatures dip below freezing overnight. If you’re unsure what type of cover or insulation is right for your home, Magic Flow Plumbing can inspect your setup and recommend the best solution. Step 4: Drain and Winterize Your Irrigation System Sprinkler systems and underground irrigation lines are especially vulnerable during cold weather. If water remains inside them, even a light freeze can cause pipes to crack below the surface — which can be a nightmare to locate and repair in spring. How to do it right If you don’t have experience with this, it’s safer to hire a licensed and bonded plumber or irrigation specialist. The team at Magic Flow Plumbing can winterize your irrigation system professionally to ensure every line is dry and ready for the cold. Step 5: Protect Outdoor Pipes and Exposed Plumbing Any pipe that runs through unheated areas — garages, crawl spaces, or along exterior walls — can freeze. What to check How to protect them Proper insulation doesn’t just prevent freezing; it also helps your plumbing system run more efficiently year-round. Step 6: Clear Gutters, Downspouts, and Drains This step isn’t directly about plumbing lines, but it’s essential for preventing water damage during winter. When gutters or drains are clogged with leaves and debris, water backs up and can freeze near your home’s foundation or around outdoor plumbing fixtures. What to do Clogged drainage systems are one of the top causes of basement leaks and foundation cracks in the Greater Seattle area during wet winters. Step 7: Don’t Forget Outdoor Features If your home has additional water fixtures like fountains, outdoor kitchens, or water features, they need winterizing too. Fountains and water features Outdoor kitchens Taking care of these systems now saves you from cracked pipes, broken fittings, and damaged fixtures later. Step 8: Check and Label Your Main Shut-Off Valve If a pipe ever bursts — whether inside or outside — you need to know exactly where your main shut-off valve is. Here’s how to check it If your main shut-off valve is hard to reach or outdated, Magic Flow Plumbing can replace it with a modern, easy-to-use ball valve so you can act quickly in an emergency. Step 9: Test Your System Before the First Freeze Once everything’s drained, shut off, and insulated, test your system to make sure no water remains. A few minutes of double-checking now can save you thousands in springtime repair costs. Step 10: Schedule a Professional Winterization Service While DIY winterizing is possible, many homeowners prefer the peace of mind that comes from hiring professionals. A licensed and bonded plumber from Magic Flow Plumbing can: We use specialized equipment to make sure no water is left in pipes, even in hard-to-reach spots. What Happens If You Don’t Winterize Skipping winterization can lead to serious damage, including: Repairs for burst pipes can easily exceed $2,000–$5,000, not including cleanup and water damage restoration. Spending a little time (or hiring a professional) now can save you from that headache later. When to Winterize in the Greater Seattle Area In Western Washington, freezing nights can start as early as late October and continue through February. Ideally, you should complete all outdoor plumbing winterization by mid-October. Even though the Greater Seattle area has a mild climate compared to other parts of the country, it still experiences short, intense cold spells that can freeze unprotected pipes overnight. Additional Tips for Winter Protection Why Choose Magic Flow Plumbing At Magic

Winterizing Your Outdoor Plumbing: A Step-by-Step Guide Read More »

magic flow plumbing winter home

The Hidden Plumbing Problems That Show Up in Cold Weather

When the temperature drops, most homeowners in the Greater Seattle area think about keeping their homes warm and cozy — but few realize that cold weather can quietly wreak havoc on their plumbing. You might not notice these problems right away, but as winter progresses, small issues can turn into major repairs. At Magic Flow Plumbing, we’re licensed and bonded, and every winter we help homeowners uncover plumbing issues caused or worsened by cold temperatures. From hidden leaks to slow drains and frozen pipes, understanding these hidden plumbing problems can save you time, stress, and money. Let’s break down the most common cold-weather plumbing issues — and what you can do to prevent them. 1. Hidden Pipe Leaks Behind Walls and Under Floors Why it happens When temperatures drop, water inside your pipes can contract slightly, and the metal expands and contracts with it. Over time, this repeated pressure can weaken fittings or joints — especially in older homes or copper piping systems common throughout the Greater Seattle area. If a pipe freezes and then thaws, even partially, it may develop hairline cracks that leak slowly and invisibly. These leaks can exist for weeks before you notice wet drywall, warped flooring, or an unexplained increase in your water bill. Warning signs What to do If you suspect a hidden leak: We use professional-grade equipment to locate leaks behind walls, under floors, and even under concrete — before they become major disasters. 2. Frozen Pipes in Crawl Spaces and Exterior Walls Why it happens Seattle winters may not be as harsh as the Midwest, but temperatures often dip below freezing overnight. Pipes in unheated areas like garages, basements, attics, and crawl spaces are especially vulnerable. When water inside these pipes freezes, it expands and can cause cracks or complete bursts once it thaws. The result? Water damage, flooding, and expensive repairs. Warning signs How to prevent it If a pipe does freeze, don’t panic — and don’t use an open flame to thaw it. Call a licensed and bonded plumber like Magic Flow Plumbing. We’ll safely thaw your pipes and inspect for damage so the same thing doesn’t happen again. 3. Clogged Drains and Slow Water Flow Why it happens Cold weather changes the way fats, oils, and grease behave. When you wash these substances down the drain, they harden as they cool, sticking to the inside of your pipes. Over time, they combine with debris like soap scum and hair to create stubborn blockages. Outdoor drains and sewer lines can also clog from tree roots seeking warmth or ground movement caused by freezing and thawing soil. Warning signs What to do At Magic Flow Plumbing, we use advanced drain cleaning methods, including camera inspections, to find the root cause of slow drains and keep your system flowing smoothly through the cold months. 4. Water Heater Strain and Sediment Buildup Why it happens Your water heater works harder in winter because incoming water is colder. This means the unit runs longer to deliver the same amount of hot water. If there’s sediment buildup at the bottom of the tank, it acts as insulation — forcing the system to use more energy and heating elements to work overtime. This extra strain can lead to: Warning signs What to do Flush your water heater at least once a year — ideally in the fall — to remove sediment. If it’s been several years since you’ve done it, schedule a maintenance visit. A licensed and bonded professional from Magic Flow Plumbing can: That’s the best way to make sure your water heater doesn’t fail on a cold winter morning when you need it most. 5. Faulty Sump Pumps and Flooded Basements Why it happens Seattle winters often bring heavy rain. When the ground becomes saturated, water pressure builds up around your foundation. That’s when your sump pump steps in — it removes excess water from your basement or crawl space to prevent flooding. But during cold weather, sump pump discharge lines can freeze, or debris can block the outlet. When that happens, the pump runs but can’t push water out, eventually burning out the motor. Warning signs What to do If you’re unsure whether your system is working properly, Magic Flow Plumbing can perform a complete sump pump inspection and winterization. 6. Cracked or Leaking Outdoor Faucets Why it happens Outdoor spigots, garden hose connections, and irrigation systems are the first plumbing components to freeze. If water remains trapped inside and freezes, it expands, cracking the metal or damaging seals. When temperatures rise, water starts leaking from inside your walls — often without you noticing until you see damage or mold. Prevention tips If you notice dripping or a sudden loss of pressure indoors, call a licensed and bonded plumber immediately — frozen outdoor lines can leak water into the structure of your home. 7. Septic Tank and Sewer Line Problems Why it happens If your home uses a septic system, cold weather can affect how efficiently it processes waste. Freezing ground can restrict flow or cause backups. Similarly, city sewer lines can experience partial blockages from tree roots or accumulated debris. Warning signs What to do At Magic Flow Plumbing, we offer sewer and drain inspections with advanced camera technology to spot issues early and prevent winter backups. 8. Low Water Pressure Why it happens Cold weather can cause pipes to contract, and even small leaks or partial freezes can restrict flow. Mineral buildup inside older galvanized pipes can worsen the issue, especially if water sits idle for long periods. Warning signs What to do 9. Water Line Shifts and Underground Leaks Why it happens Repeated freeze-thaw cycles can shift soil around your underground water lines. Even a small movement can cause stress cracks or separations, especially in older pipes. These leaks are often invisible until your water bill spikes or your yard becomes soggy. Warning signs What to do If you suspect an underground leak, don’t dig blindly. Call a licensed

The Hidden Plumbing Problems That Show Up in Cold Weather Read More »

magic flow plumbing water heater

Why You Should Flush Your Water Heater Before the Cold Season

As the cold months approach, most homeowners in the Greater Seattle area start thinking about insulation, heating systems, and preparing their homes for winter. One essential task that often gets overlooked is flushing your water heater. It might seem like a small maintenance chore, but it plays a big role in keeping your home’s plumbing system efficient and reliable through the cold season. At Magic Flow Plumbing, we’re licensed and bonded, and we’ve seen firsthand how neglected water heaters can lead to higher energy bills, inconsistent hot water, and even major breakdowns in the middle of winter. This guide explains why flushing your water heater is crucial, how it works, and when to call a professional for help. Why Water Heater Maintenance Matters Your water heater works quietly every day, heating water for showers, laundry, and dishes. Over time, minerals like calcium and magnesium naturally build up inside the tank — especially in areas with harder water. This sediment settles at the bottom and creates a layer between the heating element and the water itself. When that happens: Before the cold weather hits, it’s a good idea to give your system a “fresh start” by flushing out that sediment buildup. Doing so helps your heater work efficiently and ensures you’ll have steady hot water all winter long. What Happens If You Don’t Flush Your Water Heater Neglecting this simple maintenance step can lead to a long list of problems: Flushing once a year — ideally before the cold season — helps prevent all of these issues and saves you from costly repairs or replacements later. How to Tell If Your Water Heater Needs Flushing Here are some common signs that your water heater is due for maintenance: If any of these sound familiar, your heater is likely full of sediment and overdue for a flush. How Flushing Works (Step-by-Step Overview) You can perform a basic flush yourself if you’re comfortable with plumbing, but for a full service — especially before winter — hiring a licensed and bonded plumber is best. Here’s how the process works: This process takes 30–60 minutes and makes a huge difference in performance and energy savings. The Best Time to Flush Your Water Heater In the Greater Seattle area, fall is the ideal time. Temperatures start dropping, and your water heater is about to enter its busiest season. Doing it now ensures: A good rule of thumb: flush your water heater once a year, or twice a year if your area has hard water. Electric vs. Gas Water Heaters — Do They Need the Same Care? Yes — both types require regular flushing, but they operate differently: Regardless of the type, a professional cleaning ensures all components are checked, including the temperature-pressure relief (TPR) valve and anode rod, which protect against pressure buildup and corrosion. Benefits of Flushing Before the Cold Season How to Extend the Life of Your Water Heater After Flushing Once you’ve flushed your water heater, there are a few additional steps you can take to keep it running efficiently all year long: 1. Insulate the Tank and Pipes Use a water heater blanket and foam pipe sleeves to reduce heat loss — this is especially helpful in garages, basements, and older Seattle homes. 2. Test the Pressure Relief Valve Lift the valve slightly to make sure water flows freely, then release it. If it doesn’t reseat properly, replace it. 3. Check the Anode Rod This metal rod attracts corrosive minerals and prevents tank rust. Replace it if it’s more than 50% corroded. 4. Set the Right Temperature Keep your thermostat at 120°F. This prevents overheating, saves energy, and reduces scalding risk. 5. Schedule Annual Maintenance A yearly inspection from Magic Flow Plumbing ensures your water heater and other plumbing components are winter-ready. Why You Should Call a Licensed and Bonded Professional While flushing sounds simple, it can get tricky — especially if valves are stuck, sediment is excessive, or leaks appear. Hiring a licensed and bonded plumber in the Greater Seattle area ensures: At Magic Flow Plumbing, we handle everything from basic water heater maintenance to full replacements. Our technicians are trained to spot early warning signs and fix them before they cause costly damage. What Happens During a Professional Water Heater Flush When you schedule a maintenance visit, here’s what our plumbers typically do: We also check nearby plumbing lines to ensure there are no clogs or pressure irregularities — an often-overlooked step that can prevent bigger issues later. Eco-Friendly Benefits of a Clean Water Heater Maintaining your water heater isn’t just good for your home — it’s good for the environment, too. A clean, efficient system uses less energy and reduces your household’s carbon footprint. In the Greater Seattle area, where sustainability matters to many homeowners, small maintenance steps like this align with a greener lifestyle. You’re saving energy, extending appliance life, and preventing waste from premature replacements. When to Replace Instead of Flush If your water heater is over 10 years old, leaking, or struggling even after maintenance, it may be time to replace it. Signs you may need a new unit: Magic Flow Plumbing can assess whether your water heater is worth saving or if a replacement would be more cost-effective. We install both traditional and tankless water heaters, depending on your home’s needs. Preparing for Winter — The Smart Way The best time to maintain your plumbing system is before problems start. Flushing your water heater is one of the simplest ways to prevent winter stress on your plumbing and heating systems. When paired with other fall maintenance — like insulating pipes and checking valves — it ensures your home runs smoothly all season long. If you’re short on time or not comfortable doing it yourself, schedule a fall maintenance visit with Magic Flow Plumbing. Our team is licensed and bonded, experienced, and ready to serve homeowners across the Greater Seattle area. Final Thoughts Flushing your water heater might seem minor, but it’s one of the

Why You Should Flush Your Water Heater Before the Cold Season Read More »